If you have an automated irrigation system in your yard, you know that you sometimes have to replace sprinkler heads. Learning to identify the malfunctioning ones early will help you save money and keep your lawn healthy. Once you’ve spotted the problem sprinklers, you often can do straight-forward replacements yourself.
When to Replace Sprinkler Heads
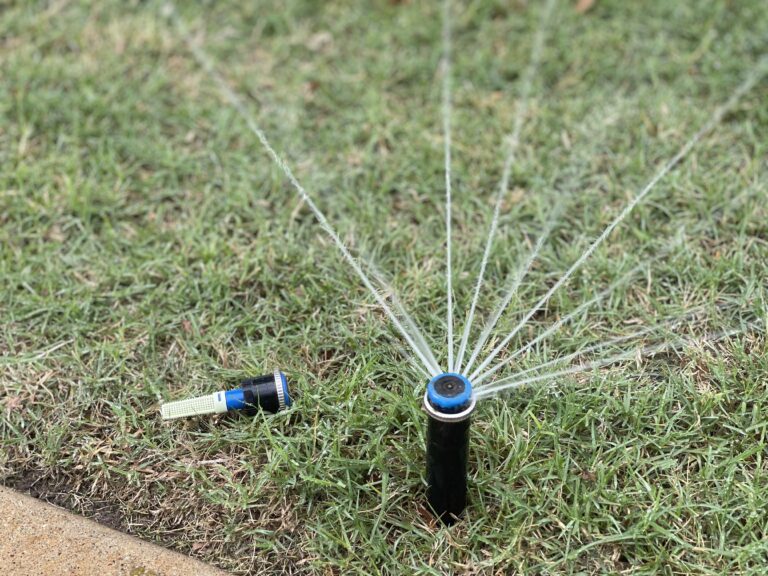
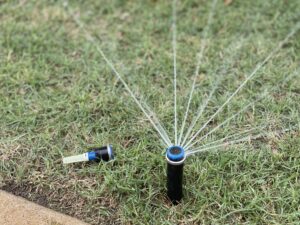
- Broken sprinklers. If you see water geysers, puddles or spurts of water around the sprinkler heads, or water spraying unevenly or not at all, you may have a broken sprinkler head. It could be cracked, partially missing, or completely broken off.
Broken heads can occur when they’re set too high, and lawn mowers or vehicles run over them. They can also break when people trip on them, or when animals chew on the nozzles looking for a drink.
- Heads not popping up and retracting properly. Sometimes the head gets jammed when sand or dirt gets stuck in the gap between the riser stem and sprinkler cap.
You can try to loosen and flush out the sand or dirt by turning on the system for the zone and pushing the sprinkler back down into its body gently with your foot. Then release it so it pops back up. Do this a number of times to see if the sprinkler will pop up and retract fully on its own.You can also turn the water off and try to pull the sprinkler riser up by hand. The retraction spring will offer some resistance, but the riser should move up and down easily without catching or hanging up. However, if sand or dirt has badly scratched the riser or surrounding seal, the riser won’t move freely because of the rough surface. You’ll have to replace the sprinkler head.
- Rotor sprinklers not rotating. If the water pressure is adequate, the head could be clogged. Take the sprinkler apart and clean any dirt or debris. Then clean the filter. If this doesn’t work, get a new sprinkler.
- Too much water spurting out between the sprinkler riser and cap when the riser is fully extended. You either have a bad riser seal, or a scratched riser or cap. Replace the sprinkler.
- Excessive blow-by. Blow-by is the small amount of water that comes out between the riser and the cap when the riser starts to extend. A lot of water spurting out when the riser comes up isn’t normal, and you should replace the sprinkler.
- Different types of sprinkler heads in the same zone (e.g. rotors and spray heads). Choose the type you want and replace the others. Each type of head has its own precipitation rate so mixing them in the same zone will waste large amounts of water. Your lawn will be too wet in some areas and too dry in others.It’s best to use one brand and model in each zone, but if you can’t, make sure to match the precipitation rates.
- Low head drainage. This occurs when your sprinklers continue to drain for some time on slopes when the system is off. Replace your sprinkler heads at the lowest elevations with ones that have check valves. These work by closing and holding water in the pipes after the system is turned off.
How to Replace a Sprinkler Head
- Make sure the system is off. It’s better if the zone where you’re replacing the sprinkler has been off for twenty-four hours to prevent working in mud.
- Use a serrated knife, trowel, or garden spade to cut a wide circle in the grass around the sprinkler head, about 2-3 inches deep. Carefully remove the turf in one piece (if possible) and set it aside for replacing later. If the area around the head is loose material, such as mulch or gravel, go straight to the digging step.
- Dig a hole around the sprinkler about a foot in diameter and 8-10 inches deep until you see the water supply pipe (and be careful not to puncture it). Pile the dirt you’ve removed from the hole on a garbage bag or in a pail to make it easier to put back in the hole later. Inspect the pipe for any obvious signs of leaks or damage. If you see any, it’s time to call in an irrigation professional.
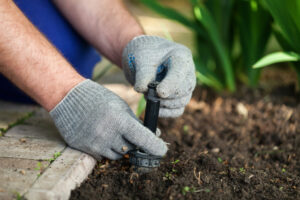
- Reach under the sprinkler head with one hand and hold onto the riser at the base of the sprinkler attaching it to the water pipe. Twist the sprinkler counterclockwise with your other hand to remove it from the riser. If it’s difficult to unscrew, use wrenches, or hold the riser with slip joint pliers to keep it from coming loose from the water supply pipe. Check the riser for any damage or signs of leaks, and don’t let any dirt fall inside. You might want to cover it with a small cloth or plastic bag.If the riser comes off with the sprinkler head, just unscrew the two pieces to inspect the riser for damage. Any cracked, severely worn, or misaligned threads mean the riser needs to be replaced. If the threads look fine, reattach the riser to the water pipe.
If you need a new riser, get a new poly (polyethylene) cut-off riser with multiple sets of threads molded into it (get this when you’re buying your new sprinkler). Buy one to match the diameter of the old riser and cut it off to the length you need with a pipe cutter or knife.
- Take your old sprinkler to the store for comparison and buy the correct replacement (e.g. same type and precipitation rate). If your sprinkler uses nozzles, make sure your new one comes with an assortment.
The information you need for matching should be on the top of the old sprinkler head, but if the top part is missing, look for the specs on a label on the body of the sprinkler. The manufacturer’s website might also be able to help you find the brand and part number. As a last resort, get the specs from another sprinkler in the same zone. You can ask someone knowledgeable at the store for help if you need it.
- Flush out any dirt from the riser by turning on the water to the zone. After flushing the riser, turn the water off, and thread the new head onto the riser and hand-tighten it. Be sure to hold the riser beneath it with the other hand. You don’t need seal tape with plastic fittings.Don’t flush the riser with the new sprinkler attached unless it’s a spray sprinkler with a flush cap, or the nozzle and screen aren’t yet installed. Also leave the nozzle and screen off a rotary sprinkler until you’ve finished flushing. You don’t want to clog the nozzles and screens with dirt. Wait to install rotors as well.
- Turn on the zone again. Check for leaks, and make sure the sprinkler is functioning properly.
- Fill in the hole, keeping the sprinkler straight, and compacting the soil around the sprinkler body to prevent it from shifting position over time. The top of pop-up sprinklers should be about 1/4 inch to 1/2 inch above the soil level. Replace the sod.
- Make any adjustments to the sprinkler to set up its required coverage. Always call an irrigation professional if you have any difficulty replacing a sprinkler head, adjusting its arc and radius, or if you’ve noticed any needed repairs while working with the system.
If you’d rather not tackle replacing the heads yourself, call us at (512) 694-1147 or fill out our online contact form. We can help you with any of your sprinkler repair or maintenance needs. We’re here to help.